Sunday, July 30, 2023

Bicep Deployment Pane: Validate, What-If and Deploy at your fingertips!


Introduction

The Bicep VS Code extension keeps on improving. Besides validation, intellisense, code navigation, generating param files, the visualizer and much more, I tested a new experimental feature this weekend. The deployment pane!

I could not have thought about a better name for this feature as it literally is a pane in VSCode that helps you with the deployment of a Bicep template.

You can of course already easily perform deployment, validation, and what-If using PowerShell and the AZ CLI. Even a deployment can also be kicked off directly from the VSCode by performing a right-click on any Bicep file as shown below.

This article walks through the Bicep Deployment Pane feature, providing Validate, What-If and Deploy at your fingertips in VSCode!

Bicep Deployments pane example

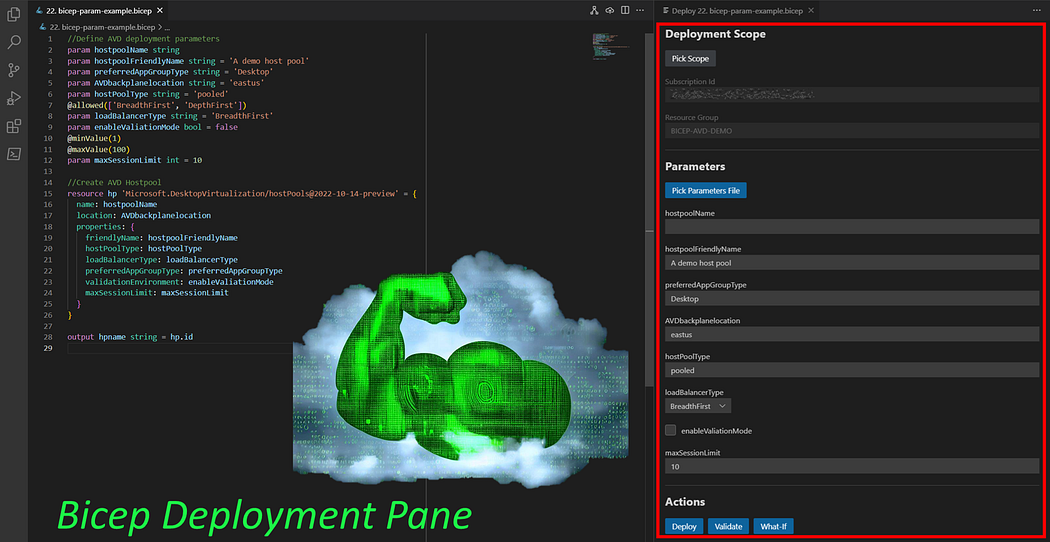
Lets consider the Bicep template as shown below. If you have been following my previous blog posts, this will look familiar. It’s a simple Bicep template that deploys an Azure Virtual Desktop (AVD) host pool.

Let’s imagine I now want to deploy this to Azure. Before deploying it however, I want to validate my template first to make sure the ARM engine is able to process it, and let’s also perform a What-If first.

In case you’re not familiar with What-If, it allows you to preview the potential changes that will occur in the Azure resources as part of your template before actually applying those changes. It’s a great way to assess the impact of your intended deployment actions without making any actual modifications to the resources.

How to open the Bicep Deployment Pane

There are 2 easy ways to open the Bicep Deployment pane. Right-click any Bicep template and select ‘Show Deployment Pane’ or choose to open it to side. The latter is my favorite option.

Or, with any Bicep template open, click on this new Cloud icon at the upper-right corner of the VSCode editor.

Below is what you are presented with. I’ve zoomed out a little to give you a better idea of the overall experience, and we’ll zoom into each section of the deployment pane now as well.

Selecting a deployment scope

Before being able to perform a what-if, validate, or deploy you first need to define the deployment scope. Click ‘Pick Scope’ to start defining the deployment scope. After authentication, you are able to select the subscription and the resource group of your desired deployment.

Defining parameter values

Next, define the values for the parameters of the Bicep template. In this example, a template is used that contains a lot of default values, those are prepopulated in this section and you are able to modify those at this point and provide values for any parameters that are declared without default values. Also note that Boolean values are nicely shown as a checkbox, and parameters that have allowed values defined, are presented with dropdown boxes to easily perform a selection.

You can also point to a parameters file instead by clicking ‘Pick Parameters File’. Once a parameters file is selected, the deployment pane adapts to this as shown below. From this point, you are still able to modify the values by clicking ‘Edit Parameters’.

Before moving on the next section containing deployment actions, the deployment pane also prevents you from continuing with deployment actions in case the template contains errors.

Furthermore, in case you change a value you can also easily revert back to the default value by selecting ‘Reset to default’.

Validate, What-if, and deploy!

Let’s move to the action section and cover the options to perform a what-if, validate, and deploy action from within the deployment pane.

Click Validate to perform a validation of the template. Amongst another checks, the validate option looks at whether the declared variables and parameters are all used, ensures that nothing is returned from the template that might be sensitive, and that no hard-coded values are used.

In this case the template is validated and shows the result succeeded.

If we introduce a parameter in the template that is not being used. The validate step point this out and the option ‘Show JSON’ allows you to get more details on the location of the error.

Next, you can run a what-if directly from the deployment pane. This performs the same actions when using -WhatIf in the PowerShell CmdLet New-AzResourceGroupDeployment, or when adding what-if to the AZ CLI command.

The deployment pane shows the result of the what-if command, in this case indicating a new resource will be created.

Not such an exciting What-If result of course, but if we would for example make some changes in a subsequent deployment, the What-If result becomes more interesting and shows the changes that would be applied if the template was to be deployed.

And finally, when clicking Deploy, the Bicep template is deployed to Azure, and the result including the defined output are also shown in the deployment pane!

Concluding

I think the deployment pane is a great way to have validate, what-if and deploy options at your fingertips. Of course all of these actions can also be performed using AZ CLI, PowerShell and other methods, but having this directly integrated into VSCode just makes life easier.

Deployment Pane is an experimental feature at this point. To test drive the functionality, make sure to use a recent preview build (is used 0.19.84) and enable the feature in the extension settings as shown below.

Shout out to Anthony Martin who performed a live demo of this feature at last weeks Bicep Community Call!

Thursday, July 6, 2023

Deployment Stacks for Bicep are awesome: a full walkthrough & sneak peek and of what's coming soon!

An early look at what is coming very soon with Deployments Stacks in Azure, how to use them, and how this further empowers your Bicep templates! Spoiler alert: it's awesome! 💪


 ðŸ’ª What is the challenge?

Azure deployments at scale also introduce life cycle management issues at scale. Ideally all resources within a resource group share the same life cycle and updates to that life cycle are limited to resources within that resource group only. When your Azure deployment increases in size, there is a good chance your deployments are going to span across multiple resource groups, multiple subscriptions and possibly even multiple management groups. This can make the life cycle management of Azure resources complex. Further more, there currently is no easy way to remove (destroy) all resources that are part of a logical collection in Azure. And lastly, it would be great to have the ability to ensure resources from a such a logical collection are protected (locked) from being removed individually. Azure Deployments stacks FTW!

💪What is a deployment stack?

A deployment stack is a new Azure resource type. (You can expect a public preview very soon!) It allows you to perform operations on a logical collection of resources in Azure. The resource type of a deployment stack is defined as Microsoft.Resources/deploymentStacks. The aim of a deployment stack is to simplify the life cycle management at scale mentioned before.

All Azure resources created using a deployment stack are managed by the deployment stack. This means that to update a resources, you update the deployment stack rather that individual resources, and removing resources can (should) also be done by updating the deployment stack.

And since a deployment stack is a Azure resource itself, you can also perform any familiar action on it like e.g. protecting access using RBAC.

You might also be familiar with 'complete mode' as a deployment method. (I've personally never been a big fan of it). This (legacy) deployment method is going to be replaced by deployment stacks.

This article covers how to get started with deployment stacks. It walks through the creation of a new deployment stack, deploying resources to it, and updating the deployment stack. Note: at the time of writing this, deployment stacks are in preview.

💪 Creating Bicep files to deploy with deployment stacks

As a first step, below is a sample main.bicep file. It contains a few parameters, points to a existing Resource Group and leverages a Bicep module to deploy a few resources related to Microsoft Azure Virtual Desktop (AVD) inside the referenced Resource Group.

No alt text provided for this image

Next, consider the file below. This the Bicep module that is leveraged by the main.bicep file containing the declarations to create a AVD Workspace, 2 Host pools, and 2 Application Groups. It does of course not configure all possible properties of those resources. To keep this walkthrough easy to follow its limited to setting a few properties only.

No alt text provided for this image

💪 Deploying the deployment stack (that did sounds a little weird 😊)

Now, use the 2 Bicep templates above and deploy the main.bicep to Azure attached to a new deployment stack. In this case we'll use AZ CLI, but you can also use PowerShell by making use of the CmdLet New-AzSubscriptionDeploymentStack.

No alt text provided for this image

The AZ CLI command outputs the result and shows resources that are attached to the Deployment Stack as well as the Deployment Stack Properties that are configured, covered in greater detail later on in this article.

No alt text provided for this image

These details can also be retreived using AZ CLI at a later stage, using the following command.

No alt text provided for this image

When switching to the Azure Portal, the Resource Group that was referenced in the main.bicep, shows the resources are created usefully. More importantly, they are attached to the deployment stack.

No alt text provided for this image

Inside the resource group we provided as part of the AZ CLI command, the Deployment Stack is now visible. Note the new section Deployment Stacks on the left hand side as well.

No alt text provided for this image

💪 How to tell which resources are linked to a deployment stack

Upon deleting to Deployment Stack in the portal (which can of course also be done using AZ CLI and PowerShell), notice that we get an overview of all resources attached to this deployments stack (marked red) as well as a couple of update behavior actions (marked green).

No alt text provided for this image

  • Detach resources and resource groups means that the Deployment Stack resource will be removed and all currently attached resources and resource groups will no longer have a relationship to the Deployment Stack, but will not be removed from Azure.
  • Delete all resources and detach resource groups means that the Deployment Stack resource will be removed and all attached resources will be deleted as well, the resource groups themselves will no longer have a relationship to the Deployment Stack, but will not be removed.
  • Delete both resources and detach resource groups means that the Deployment Stack resource will be removed, and all attached resources including the resource groups we be removed as well.

💪 Modifying resources that are part of a deployment stack

Besides delete actions on the deployment stack, you can of course also modify resources that are attached to this Deployment Stack. You do this by modifying the deployment stack, rather than modifying individual reources. For this example, let's make a few changes to our main.bicep file.

  • The load balancing type is changed from BreathFirst to DepthFirst
  • A new parameter AVDHostPoolfriendlyName is introduced, and the corresponding Bicep module is also updated to accept the parameter and pass it to the creation of the AVD Host pool
  • ValidationMode is changed from false to true

No alt text provided for this image

To update the resources that are part of the Deployment Stack, simply rerun the AZ CLI command from before. You will see the notification below. Note the confirm that the deployment stack already exists. A comparison will be performed and all changes that are needed will be applied to resources that are part of this deployment stack.

No alt text provided for this image

Switching back to the Azure Portal, all 3 changes are visible.

No alt text provided for this image

💪 Removing resources that are part of a deployment stack

Similar to updating resources that are managed by the deployment stack, resources can also be removed. Lets take drastic measures and remove a few resource declarations from our bicep module. The host pool and application group for RemoteApp have now been removed. This essentially leaves 1 workspace, 1 host pool and 1 application group as shown below.

No alt text provided for this image

Again, run the same Az CLI command. Note the warning. This shows what exact action will be performed on attached resources that are not part of the bicep template (anymore). In this case the action is to detach. This means the resources will be detached (removed) from the Deployment Stack, but will still remain in Azure.

No alt text provided for this image

The output of the command confirms the detached resources

No alt text provided for this image

And the Azure Portal also confirms this as shown below.

No alt text provided for this image

If needed, you can also change the default behavior of detach to remove resources or remove resources and resource groups. To change the behavior to delete resources that are detached, use the delete-resources option as shown below.

No alt text provided for this image

If we now redo the previous action again, removing 2 resource declarations from the Bicep template and rerunning the Az CLI command, the following output is shown, deleted resources.

No alt text provided for this image

And by looking at the Resource Group, the deletion of resources can be confirmed. Only 3 resources are left since the host pool and application group that were removed from the Bicep module are now also removed from Azure.

No alt text provided for this image

💪 Securing resources that are part of a deployment stack

There is one more interesting option to cover regarding deployment stacks and that is protecting resources from deletion. Using the deny-delete parameter, you can set a special type of lock on resources that are attached to a deployment stack to prevents them from being deleted by unauthorized principals.

In this case we enable the denyDelete and only make an exception for 1 principal by proving the application ID.

No alt text provided for this image

The result is that even you have permissions to remove the resources, you are blocked from doing so based on this remove lock. A great way to make sure that resources that are part of a logical grouping are not accidentally removed.

💪 Conclusion

I recall seeing very early architectures and ideas on deployment stacks, and I must say I'm really impressed with the implementation to date!

  • Although the feature is currently still in private preview, I think working with deployment stacks is very intuitive.
  • Deployment stacks unlock lots of great scenarios like removing resources from a deployment that reside across various different resource groups, subscriptions, and management groups providing similar functionality like the destroy option that e.g. Terraform has.
  • Deployment stacks improve the overall life cycle management of Azure resources, it can prevent accidental deletion of a single resource that is part or a stack of resources that depend on each other and have the same life cycle, and it provides easy ways to rollback to a good known state.

The deployment stack feature will reach public preview VERY soon. I hope this early walkthrough was valuable to you. Stay tuned for more!💪

Looking to get started with Bicep? I authored and published the book Getting started with Bicep: Infrastructure as code on Azure