
Introduction
The REST API reference for WVD ARM (Spring Update) was released publicly last week! Great news, as this allows us to interact with the WVD service by using REST API. This article covers guidance on how to get started with REST API for Windows Virtual Desktop.
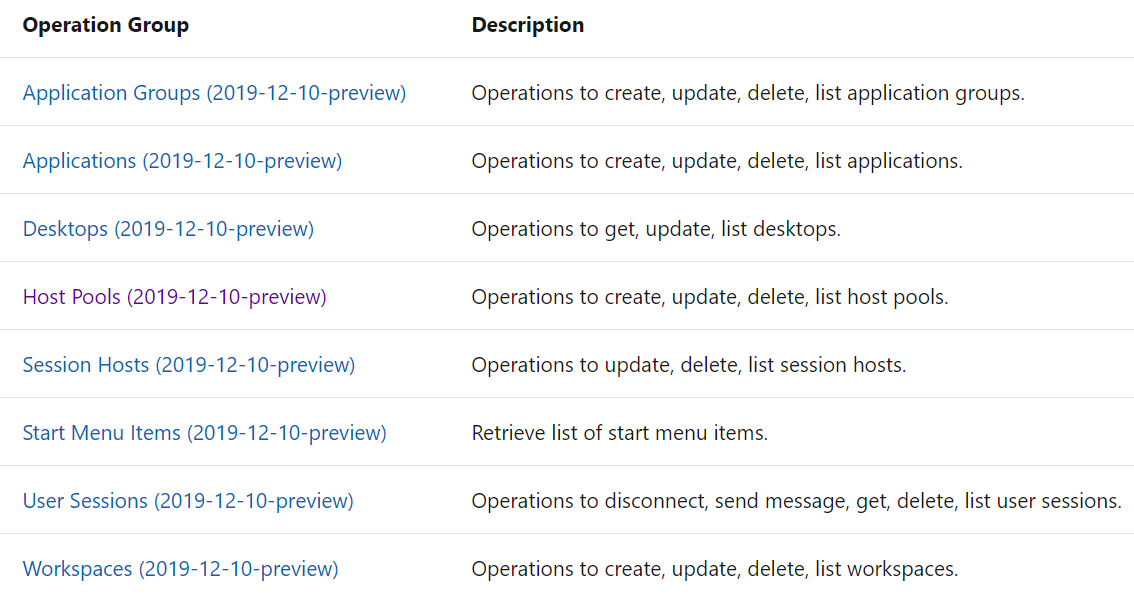
The landing page for the WVD REST API reference can be found here https://docs.microsoft.com/en-Us/rest/api/desktopvirtualization/ and contains detailed information about the various REST operations to interact with the WVD service. Currently, the following REST Operation Groups are available for WVD.
Using docs.microsoft.com
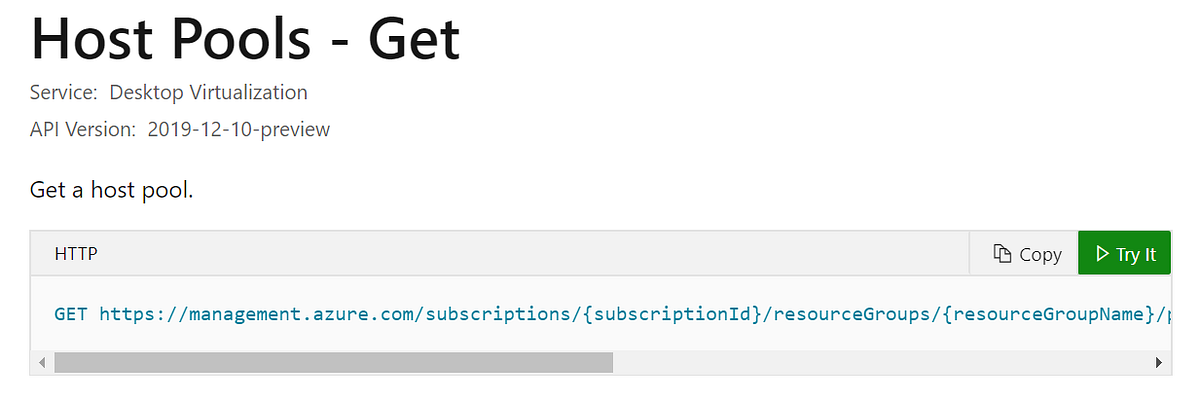
What I really like about the REST API documentation on docs.microsoft.com is that it allows you to test all the REST API code right from within your browser. For example, open the Hostpool page and click on Try It and log on with you Admin account that you use to manage Azure and WVD.
Now you can simply provide the Hostpool name and ResourceGroup and click Run.

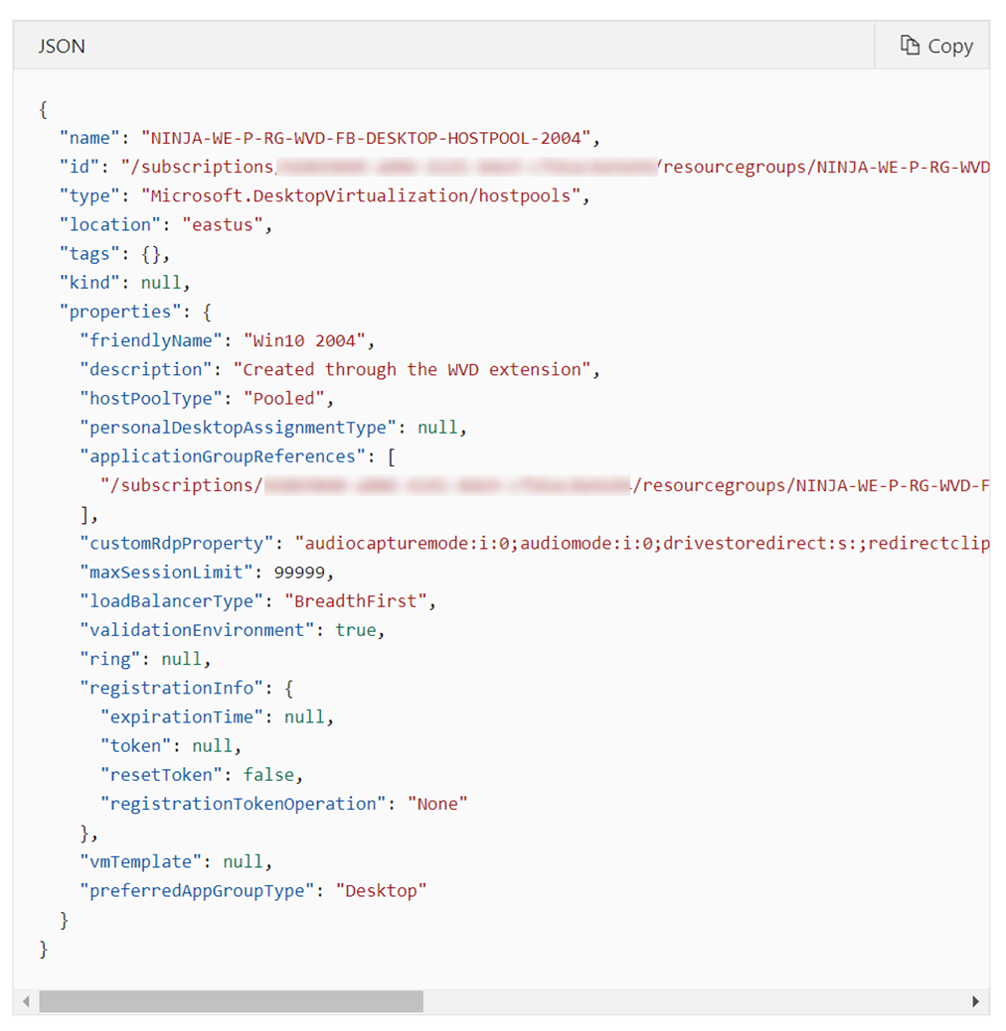
This will output the detailed information about the Hostpool right from within your browser as shown below! This allows us to receive a JSON formatted output with all the parameters and values. Very helpful a quick reverse engineering step, because this allows us to get great insights in what we can specify in REST API PUT actions.
WVD REST API via PowerShell
Using REST API for WVD Spring (ARM) release, we’re able to Get, Create, Update and Delete the various WVD components similar to how we are able to manage them using PowerShell and Management GUI in the Azure Portal. REST API is great for repetitive tasks and automation!
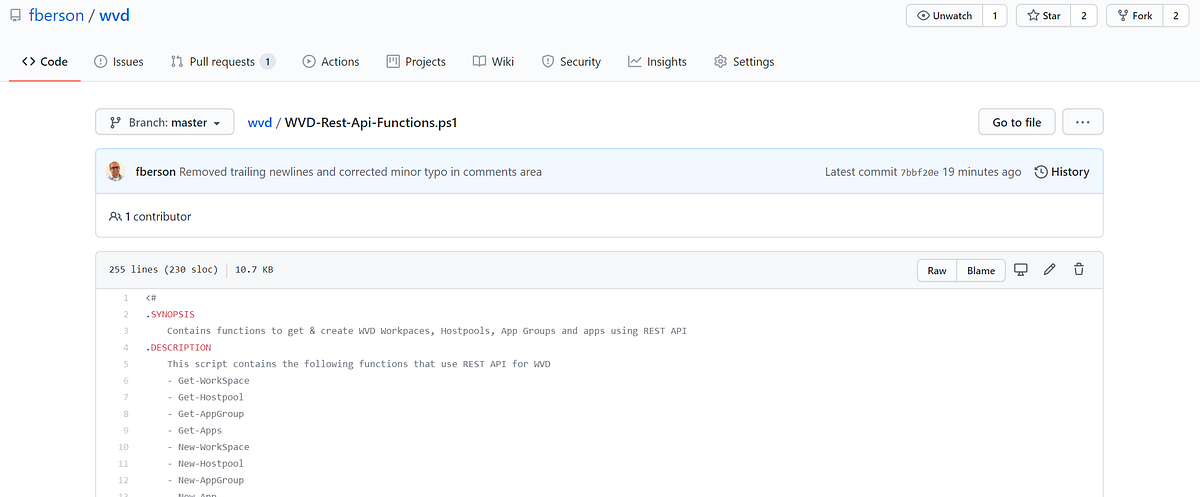
I created and shared a PowerShell script on GitHub that contains functions and examples to interact with the WVD REST API interface. In this article I will cover how you can use the steps in the PowerShell script to get a Jump Start with REST API.
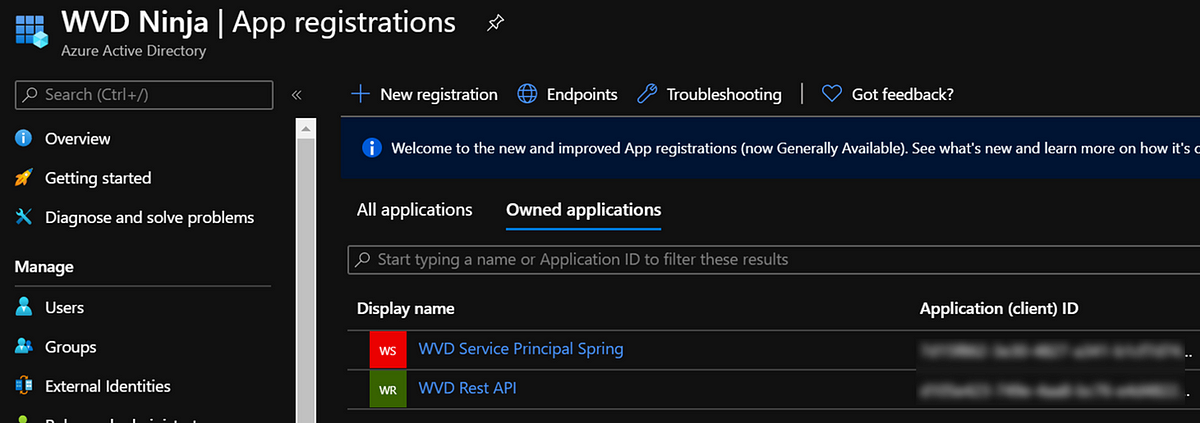
First we need an account or App Registration that has permissions to performs the actions on the WVD components in Azure. In my example, I created a dedicated App Registration for REST API as shown below. Simply create a new App Registration and once completed, create a new Secret and make sure you store both the App ID as well as the App Secret. And finally, use Azure RBAC to provide the App with permissions on the Resource Groups where your WVD resources are located (or will be created). In my example I provided the App with Contributor permissions on the WVD Resource Group I’m using.
GitHub Sample Code — retrieving an Hostpool
Once we have the App registration configured, we can dive into the REST API. In my case I’m using PowerShell. The first thing we need to do is set a couple of variables related to our Azure Environment and the App Registration we just created.

Next, we create a new API token for our App Registration using Invoke-RestMethod. We pass this API Token later on when communicating with the WVD REST API interface.

And finally, we construct a API Header containing the token type (Bearer), the token itself and the content-type which we set to “application/json”. Important note, later on in this article, we’ll will also be using another content-type.

If all goes well, the header should look something like below. We are now ready to use the REST API module for WVD, and when communicating, we’ll use the created header.

In my PowerShell script I have created 8 PowerShell functions as of right now. These 8 functions are able to get and create a WVD Hostpool, AppGroup, Workspace and Published Apps. Let’s take retrieving a Hostpool as the first example. The function contains all the info that is needed to launch the invoke-restmethod command and also constructs the URL that is needed.
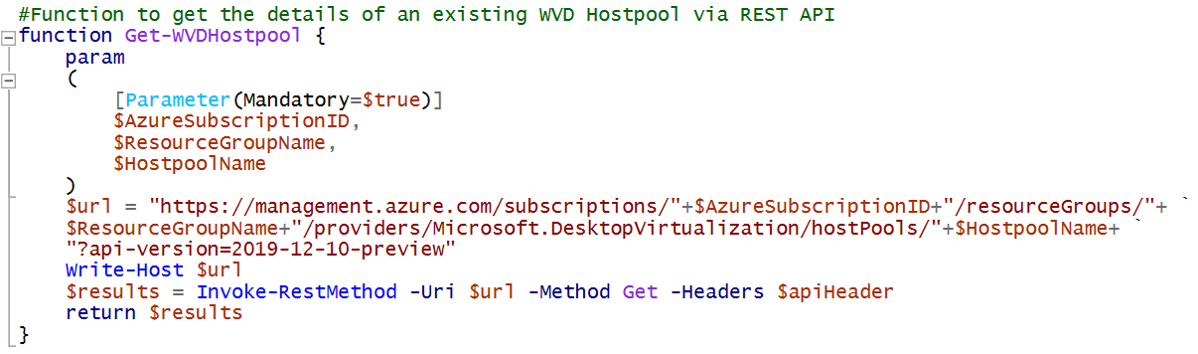
This function assumes that $apiheader already contains a valid REST API header, as created based on the previous step. The function takes 3 basic parameters that it needs to retrieve the Hostpool which are the Azure Subscription ID, the ResourceGroup where the Hostpool resides and the name of the Host Pool. Here is an example of how to call the function.

The function returns the full output of the Invoke-RestMethod which, in the example above, we captured into the variable $WVDHostPool.
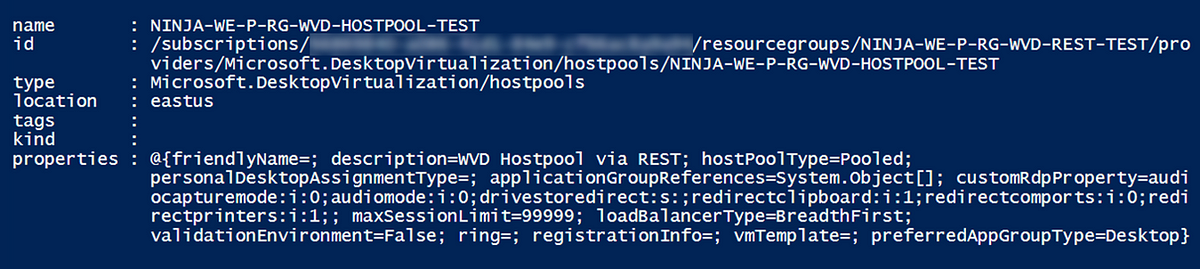
We can of course easily output and work with the values by accessing them like below.

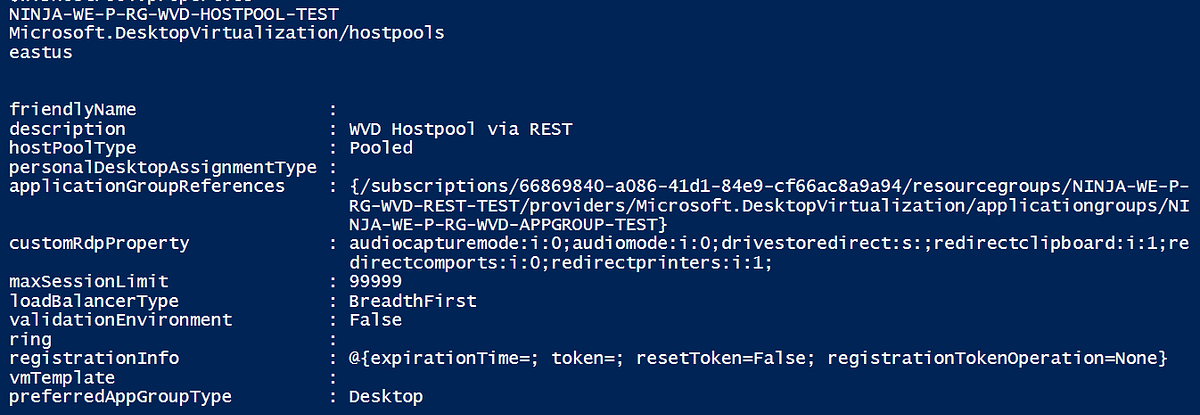
The properties attribute is the most interesting as it contains all of the details of the WVD Hostpool that we also have access to via PowerShell and the Azure Portal. Below is the output in a more structured way.
GitHub Sample Code — creating a Hostpool
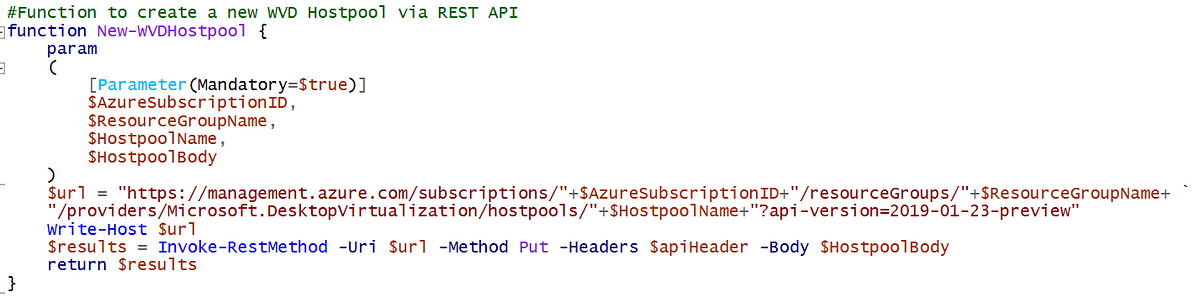
Let’s now take a look at creating a WVD object using REST API. The PowerShell script already contains ready to launch functions for creating Workspaces, Hostpools, AppGroups and Published Apps so again let’s take the Hostpool as an example.
Below is the function taken from the script. Similar to retrieving a Hostpool as we did in the previous example, this function also takes the Azure Subscription ID, the ResourceGroup and the name of the Host Pool as parameters.
With the creation however we also need to pass the additional settings, stored in the properties attribute. If you recall from the Get-WVDHostpool function, the properties attribute is of type JSON. This means we also need to provide the Hostpool properties in a JSON format as well. To make life easy I have already added the JSON code to the PowerShell script. Below is what this looks like
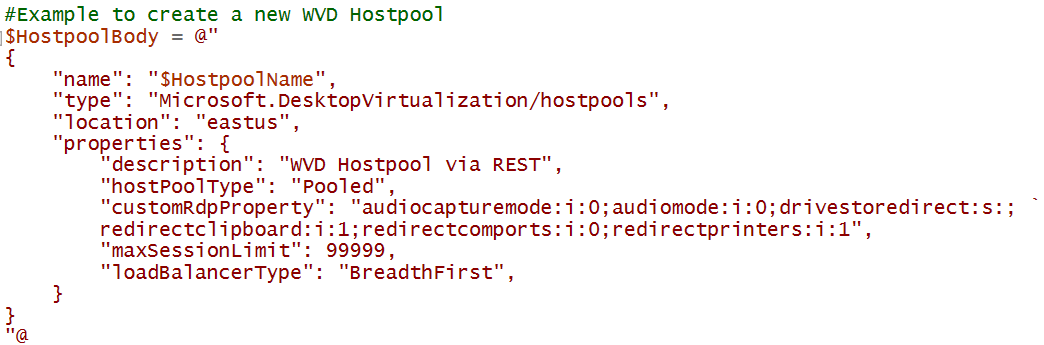
As you can see we specified mandatory properties like the e.g. location, name et cetera. On top of that we also added custom RDP properties to enable a couple of redirection settings. Similar to how we called the Get-WVDHostpool we also call the New-WVDHostpool and pass the parameter including the body with the properties as shown below.

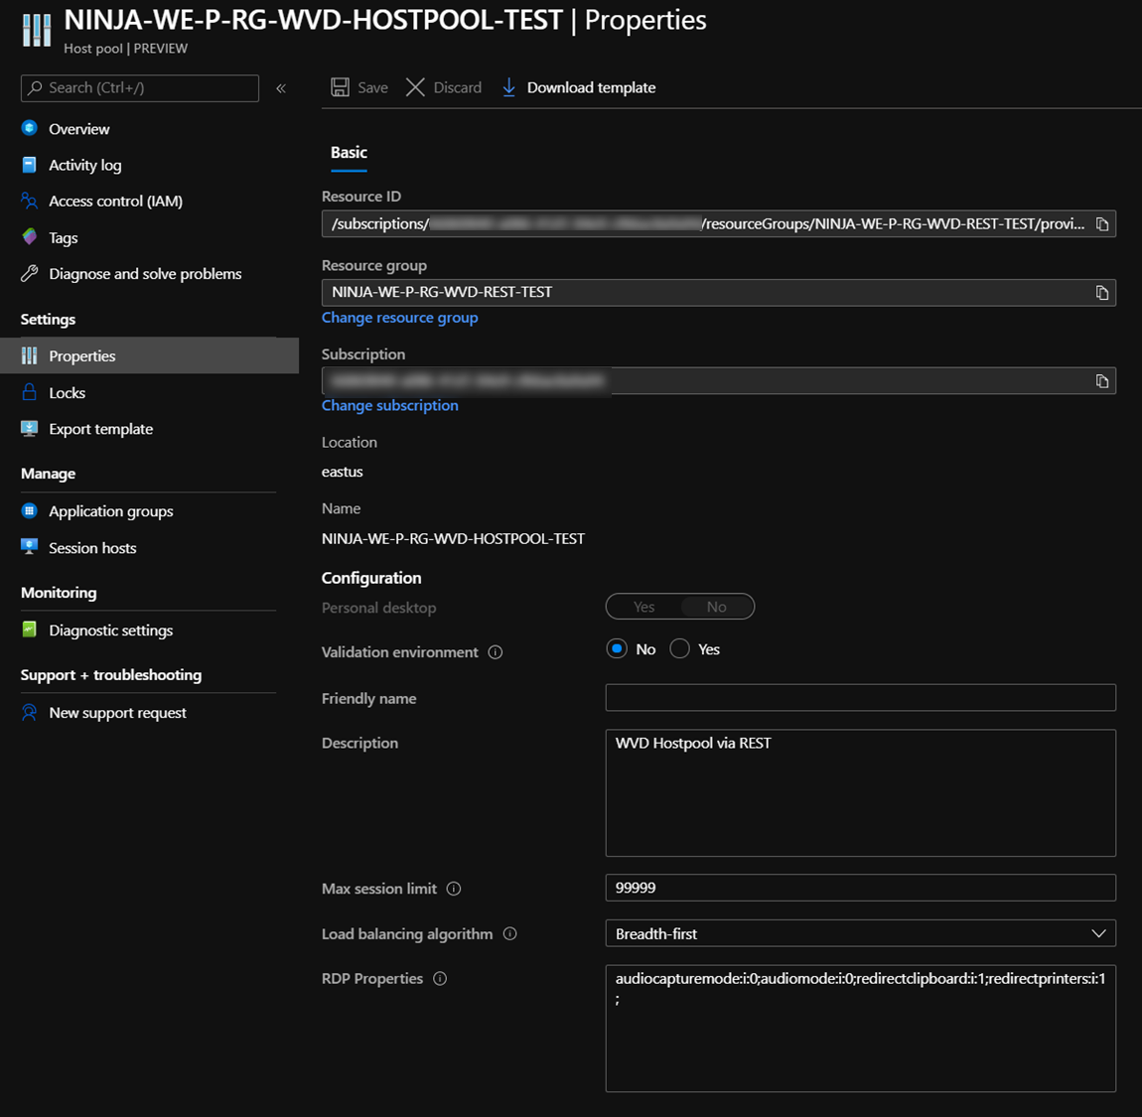
And just like that we have created a new Hostpool in WVD Spring (ARM) release, including the properties we specified!
Up until now we have covered the scenarios to both get and create a WVD Hostpool via REST API. The get and create of Workspaces and AppGroups is very similar, check out the PowerShell Script on GitHub for more information.
GitHub Sample Code — retrieving Published Apps
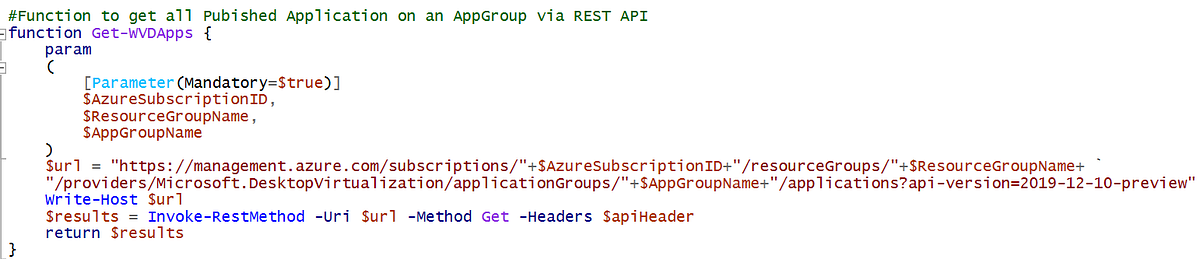
Let’s change gears and cover dealing with WVD published applications (RemoteApp) via REST API! The PowerShell scripts contains the function Get-WVDApps. This function takes the Azure Subscription ID, the ResourceGroup and the name of the AppGroup as parameters.
Similar to the other functions we’ve covered we can run the function as shown below.

This function gets all published RemoteApps for the specified AppGroup and, in this example, shows the friendly name ,file path, icon path and commandline setting. The output looks like below. Of course other properties can be added to the select statement as needed.

GitHub Sample Code — Creating Published Apps
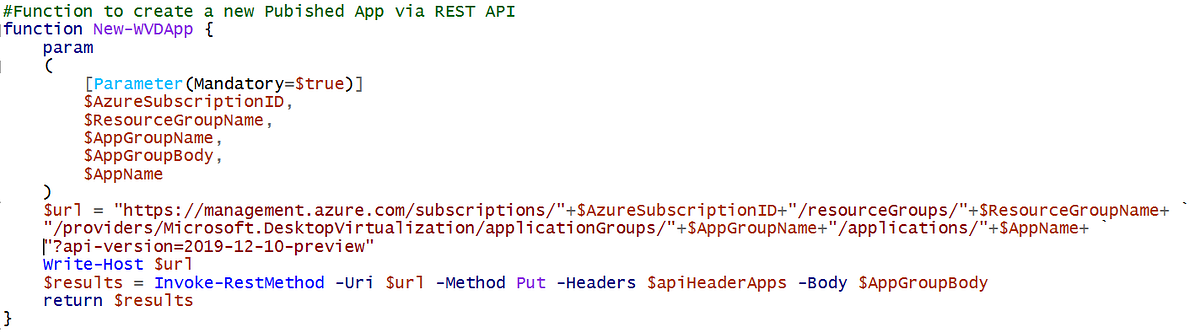
As another example scenario, let’s add Outlook as a Published App to this Appgroup. For adding a new application to an existing AppGroup I have create the function new-WVDApp. This function takes the parameters Azure Subscription ID, ResourceGroupName, AppGroup, Properties (stored inside the body) and the App Name.
IMPORTANT NOTE: The Invoke-RestMethod for Published Apps needs using a different API header! This is because it needs utf-8 to be able to parse all of the properties including escape characters. I created a second API header for this purpose in the script which sets the Content-Type to “application/json; charset=utf-8”

To publish Outlook as a new application we again need to construct a JSON containing all of the parameters as shown below.
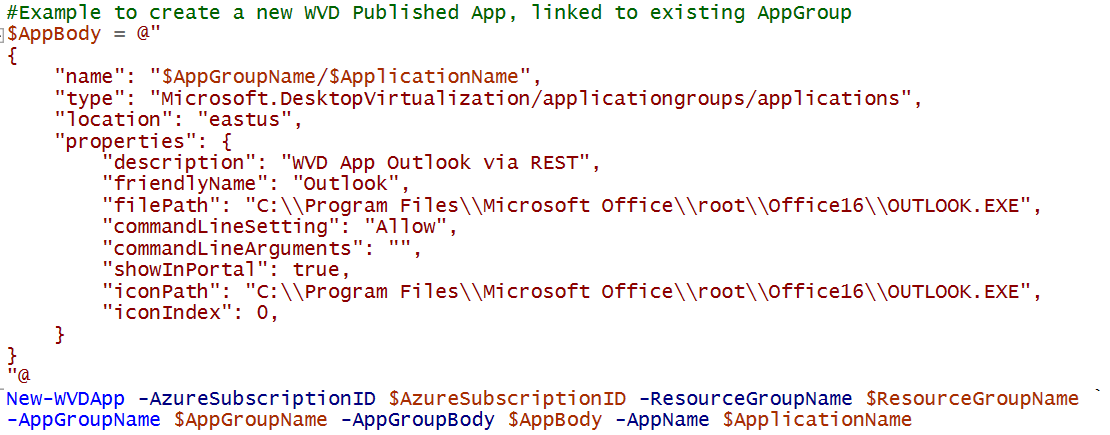
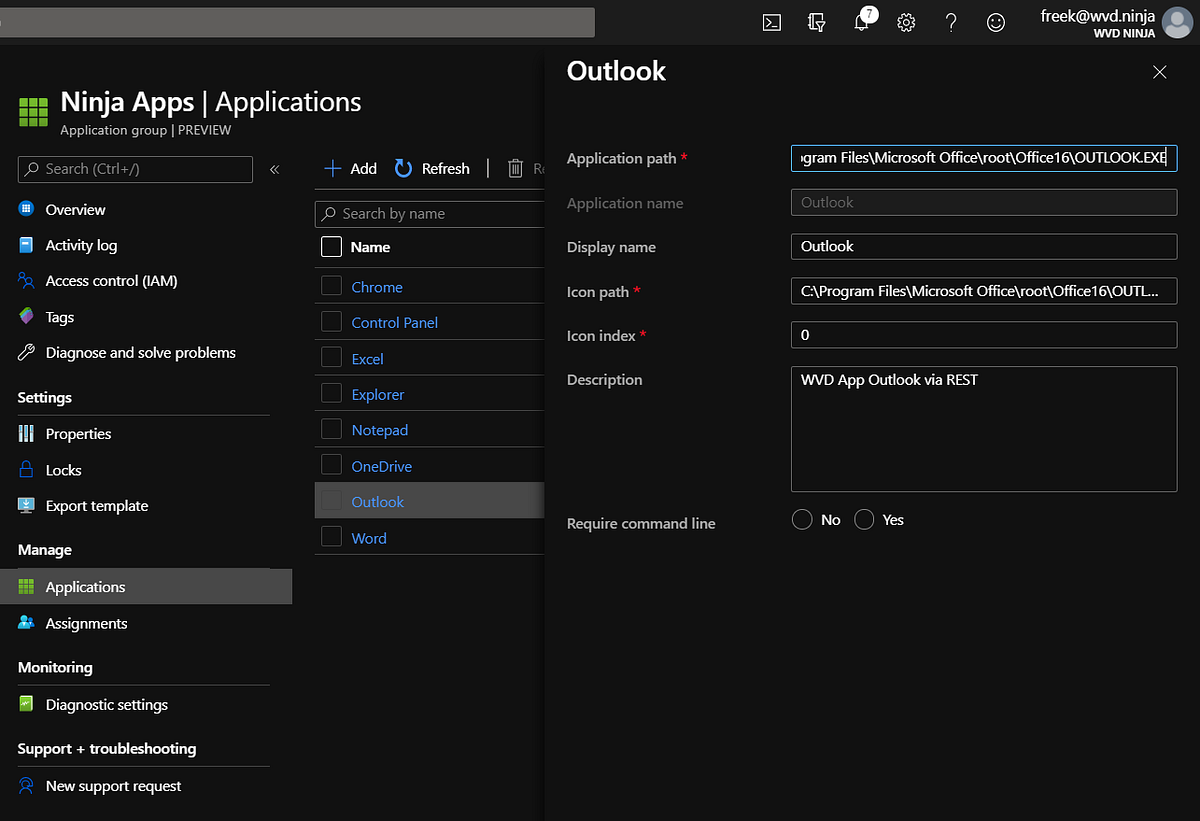
Some of the parameters are mandatory, so make sure you specify at least those. Below is the end result, Outlook is published as a new RemoteApp inside the AppGroup we specified containing the properties we provided!
This concludes this article. To reiterate, we covered the REST API interface to communicate with Windows Virtual Desktop. We used the REST API interface to create and retrieve WVD ARM (Spring) release Objects in an automated way! Here is the a direct link to my GitHub page where I shared all the sample code : https://github.com/fberson/wvd/blob/master/WVD-Rest-Api-Functions.ps1
- - happy coding 😎