
Two weeks ago, on April 30, Windows Virtual Desktop Spring Update 2020 Public Preview was released! A huge jump forward for WVD! If you missed those announcements, check out my two previously published articles:
In this article I want to highlight a different use case, using WVD to provide your (customers) administrators a secure management server accessible from anywhere using any device.
If you are running any resources in Azure, there is a good chance that one of those resources is a Management Server / Jump Host or whatever you want to name it. Such a server is used as central management for administrators to access admin tools like Active Directory Users & Computers, DNS, Group Policy, other MMC Snap ins and any other 3rd party vendor management consoles. It is also often used a single point of entry to RDP “jump” into other servers. Why is this? When organisations move resources to the Public Cloud, in this example Microsoft Azure, the first thing you need in Azure is Networking & Storage. In most cases expanding a current (on premises) Active Directory Domain (ADDS) is the next step to support Domain Services for Azure resources. Or, you might be implementing Azure Active Directory Domain Services (AADDS) or Azure Active Directory only. Having either of these services available in Azure allows you to deploy Domain Joined Application Servers, File Servers, Database Services et cetera. As you move more resources to Azure, the need for a centralized management server grows. In many cases you already have such a management server on premises or at a hosting facility. A couple of questions: How are you allowing access to that management server? Using a VPN? Published by an RDS/Citrix/VMware platform? Is it secured by Conditional Access & MFA? Can administrators access it on any device?
Why not leverage the Windows Virtual Desktop platform in stead?
Use a centralized Management Server / Jump in Azure and publish it to your administrators, applications vendors, external contractors using Windows Virtual Desktop! This allows secure access using any device from any location!
Using an RDS deployment (on premises, hosted or in the Public Cloud) you can of course achieve the same the goal. For example if you have an RDS deployment in your environment that you use to publish applications and desktops to end users, it makes perfect sense of course to re-use that platform for administrators to access a management server. But if you don’t, setting up a full RDS Deployment just for remote management only is not that cost-effective and by default it does have the security needs we require today like for example Conditional Access, enforced MFA et cetera. Sure, you could also just deploy an RD Gateway Server with an NPS Server and MFA Extension. I wrote about this back in 2017 in the article Securing RD Gateway with MFA using the new NPS Extension for Azure MFA! and I have seen a lot of organizations successfully use this approach. Also remember that using RDS requires the purchase of a RDS Client Access License. With WVD, and especially with Spring 2020 release, I believe its time to move on and start leveraging the latest technologies!
Even if you do not use the WVD platform right now, if you have the need for a secure management server in Azure, leveraging WVD makes total sense! And if you do already have WVD for other use cases, re-use it and eat you own dog food!
So, how do we get started? Deploying a WVD Workspace including Host pool and AppGroup for the purpose of publishing a Management Server is similar to deploying WVD for any other purpose. Your deployment options are as follows
- Deploying using the Azure Marketplace entry in the Azure Portal. This allows you to deploy all the necessary WVD backplane components including the VM acting as the Management Server. Recently published article on Tech Community by Christiaan Brinkhoff
- Using your own custom JSON template, specially useful if you are deploying the same setup in multiple environments or for multiple customers.
- Deploying using 3rd party tools or community tools. For example CloudJumper (who recently became part of NetApp), Nerdio, the free community WVD Management GUI provided by Marcel Meurer, or any of the other tools available.
For the purpose of this article, we’ll go for option 2. We’ll use a JSON template that we can easily re-use in various Azure Subscriptions. If you are less familiar with JSON, a while back I published a 9-part series of articles on deploying RDS in Azure IaaS using JSON templates that is a good start to get introduced into JSON based on the RDS use case.
STEP 1 Creating the WVD backplane components
We’ll start this walkthrough with the creation of a WVD Workspace using JSON. The section below shows this code. The Object Type to deploy is called Microsoft.DesktopVirtualization/workspaces. The minimum we need to define is a name, location, friendlyname and description. We’ll leave the applicationGroupReference empty since we are creation an association later.
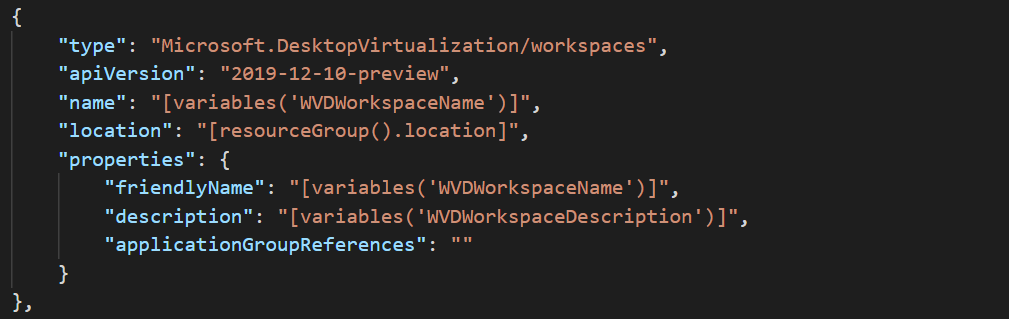
To make sure name of the WVD Workspace meets the overall naming convention I’m using for other Azure Objects, I define the WorkspaceName as follows.

Next, we create the Host Pool. We need a couple properties to define the friendlyname, description, hostpool type and load balancing type.
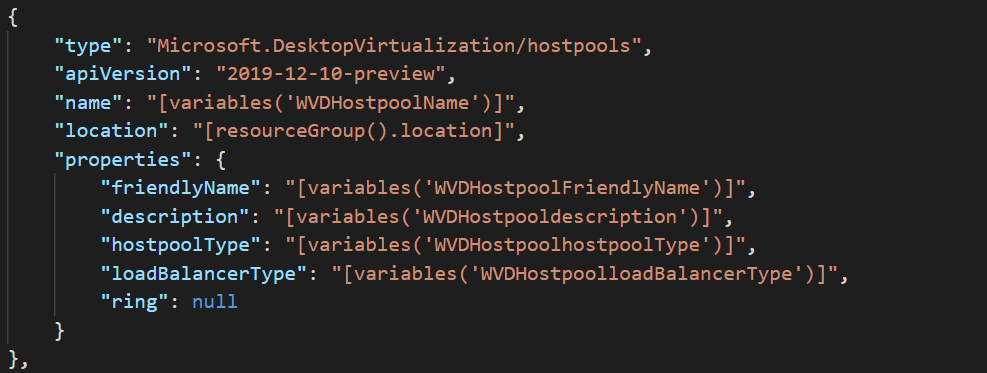
Again, to make sure we comply to a generic naming convention we define the host pool name as shown below. For the Host Pool load balancing type we select Pooled since multiple Administrators will be sharing sharing a pool of x number of Management Servers. We define the load balancing type as BreathFirst so that sessions are distributed evenly across the VM’s we publish as Management Servers as part of this host pool.

Breadth-first distributes user sessions across all available session hosts in the host pool. Depth-first load balancing distributes user sessions to an available session host with the highest number of connections which has not reached its maximum session limit threshold. More info: https://docs.microsoft.com/en-us/azure/virtual-desktop/configure-host-pool-load-balancing
Next, we define the creation of a WVD App Group. Again we define the usual properties like name, location, friendly name and description.
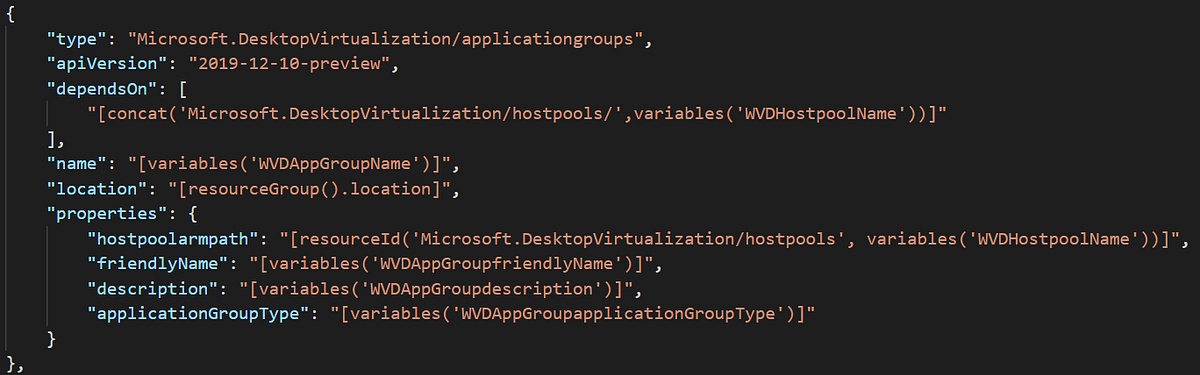
For the property applicationGroupType we choose “Desktop” since we are publishing a Full Desktop session towards the management server. The other option is RemoteApp which allows us to publish individual applications. For the property hostpoolarmpath we provide the resource ID of the hostpool we had create earlier. The screenshot below shows the list of variables used to give you an idea what was specified.

STEP 2 Creating the Management Server VM
Since we now have completed the JSON code to create WVD backplane components, lets cover the creation of the Management VM itself. There are guides available online that cover the creation of a VM in Azure using JSON. Therefor, I will not duplicate that content. A good place to start is Create a Windows virtual machine from a Resource Manager template and Virtual machines in an Azure Resource Manager template. Also, if you are looking for a simple, yet fully working ARM Template check out this GitHub location Very simple deployment of a Windows VM.
In my case, I have reused an existing ARM template we use to deploy a new vanilla VM to Azure inside the specified Subset and using the specified naming convention. On top of that I like to use the Domain Join Extension. This allows me to join the VM to a existing domain in the OU that I specify. More into of the extension can be found here on Github: Joins an Azure virtual machine into an AD Domain by using JsonADDomainExtension extension
In most case, you will not want to deploy a vanilla Windows Server 2019 or Windows 10 Enterprise Multi-Session VM. Instead, it’s convenient to create your own Template Image in Azure first. You can do that by deploying a new VM in Azure, Windows Server 2019 or Windows 10, and once that is complete install all the tools you want to have on the management server. For example you might want to install the RSAT tools and any other 3rd party management tools you want to allow administrators to leverage.
If you select Windows Server as your operating system for a WVD Template Image make sure you install the RD Session Host role, otherwise the WVD deployment will fail. For Windows 10 Multi-Session, this is not needed. Also, using Windows Server requires an RDS Client Access License where Windows 10 Multi-Session does not.
Once you are done customizing the VM you need to sysprep and generalize the VM and capture it to a Template Image.
Note that the actions below result in the VM object that you used to create the template image, becomes unusable. Therefor you might want to take a snapshot of backup before starting the starting Sysprep and capture process.
For instruction on how to sysprep and generalize, follow this guide Create a managed image of a generalized VM in Azure
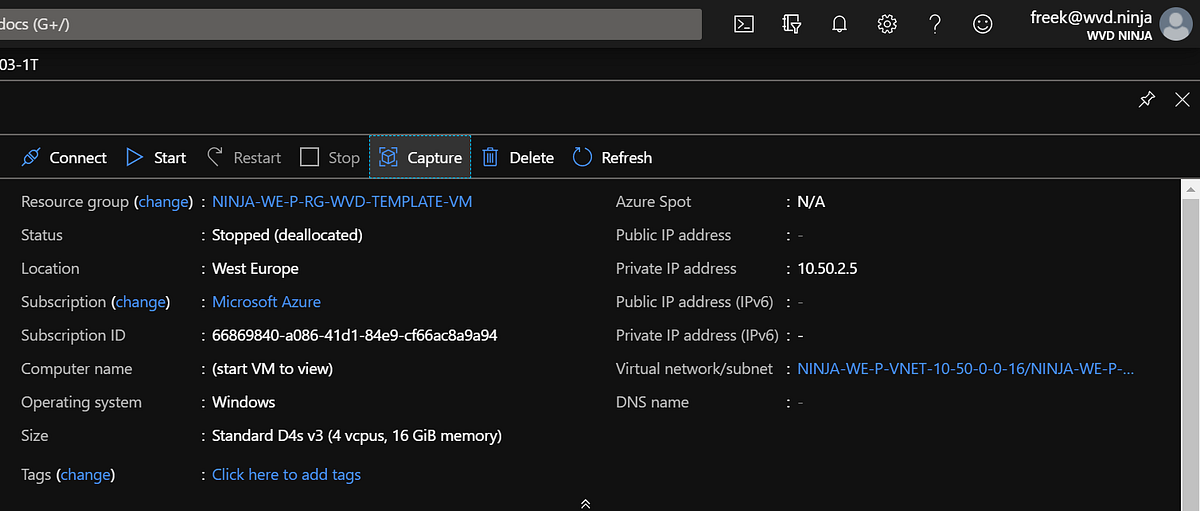
And finally, to create a Template Image object we capture the VM to a Template Image. To do this, select the capture option on the VM and specify a Tempate Image name and Resource Group location.
STEP 3 Have the VM add itself to the freshly WVD host pool
During step 1 we created the JSON code code create the WVD Workspace, Host Pool and AppGroup. During step 2 we talked about creating the JSON code to create a domain joined VM, optionally based on a Template Image. Its now time to bring it all together! Lets cover the most critical piece, automatically adding the freshly deployed VM to the brand new hostpool we deployed.
Of course we could go ahead and use the WVD Management options on the Azure Portal to add the new VM to the new Host Pool. In stead, lets cover how to automate that part and have the VM join request a new registration key and using that key add itself to the Host pool.
I selected ARM PowerShell extensions to perform this action. Main reason is that this allows me to re-use that same PowerShell script when expanding the Host Pool with additional servers using ARM and even leverage it as a way to (re)register VM’s as part of troubleshooting steps in the future by manually kicking of the same script.
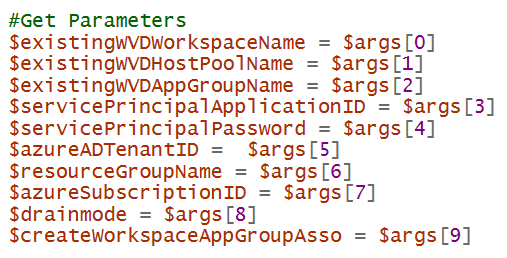
To have the script support a variety of different use cases it accepts the following 10 parameters to define how the host adds itself to the existing host pools and what other optional configurations are performed
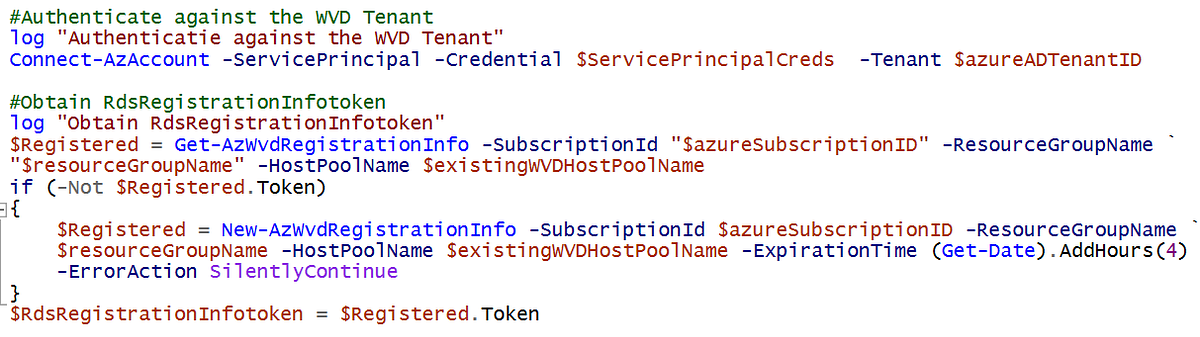
Next, the script authenticates using the Service Principal account and checks for existing registration info. If registration info for the Host pool exists, it grabs the corresponding token and if not, it creates a new registration info and collects that token.
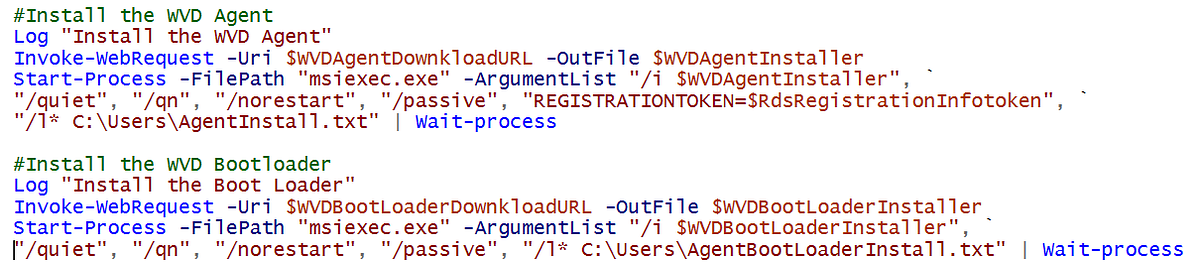
Next, the scripts downloads both the WVD Agent and Bootloader and silently installs it on the WVD Session Host providing the token from the previous step.
Optionally, the WVD Host can set itself in drain mode by specifying the DrainMode parameter. For the purpose of this Management Server it’s most likely not needed, but this allows us to re-use this script to add additional WVD Host servers to a production WVD Host pool which we do not want to take in production right away. E.g. if you are rolling out a new Template Image version and want to switch over later during the evening or a different maintenance window.
And Finally, the script (optionally) associates the AppGroup with the Workspace. This is optional and particularly handy when the script was part of a full JSON Deployment in which a new Workspace and AppGroup were also created.
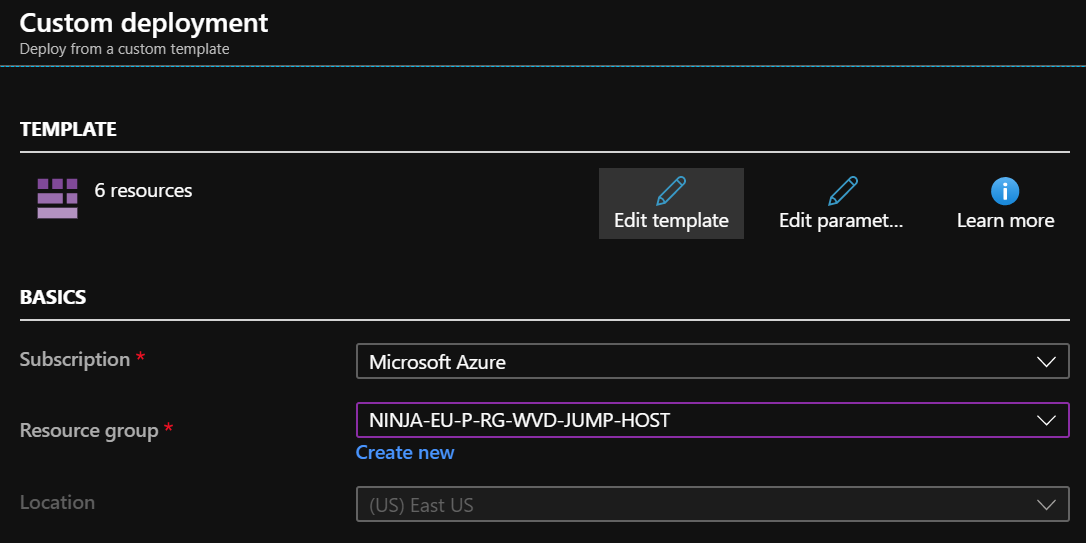
STEP 4 Deploying the Custom JSON Template
Let’s now take a deploying in an Azure Subscription. We perform a new custom deployment in our Subscription. and deploy it to a dedicated Resource Group.
As stated before, I’m reusing an existing JSON template we also use to deploy new vanilla VM’s in Azure. And we have added the creation of a Workspace, Host pool and AppGroup to is. We also added a new PowerShell extension to run the PowerShell Steps on the deployed VM as outlined in step 3. Below is a snippet from the JSON code to give you an idea how the PowerShell Extension is launched as part of the ARM deployment.
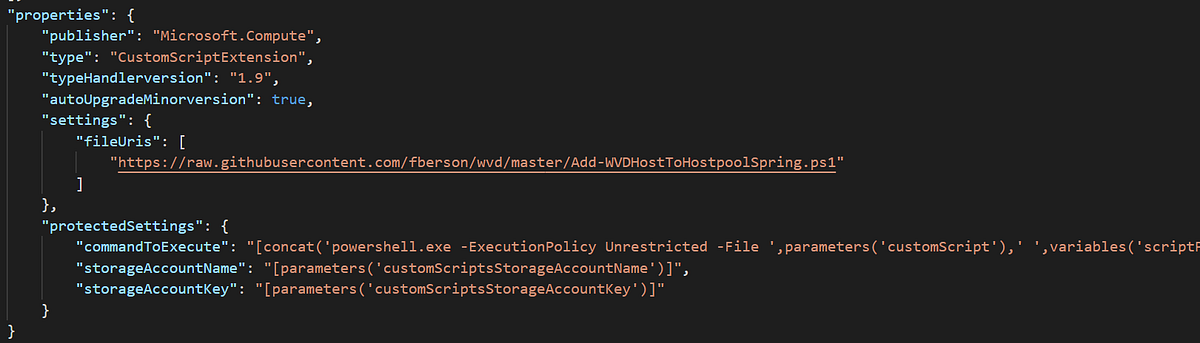
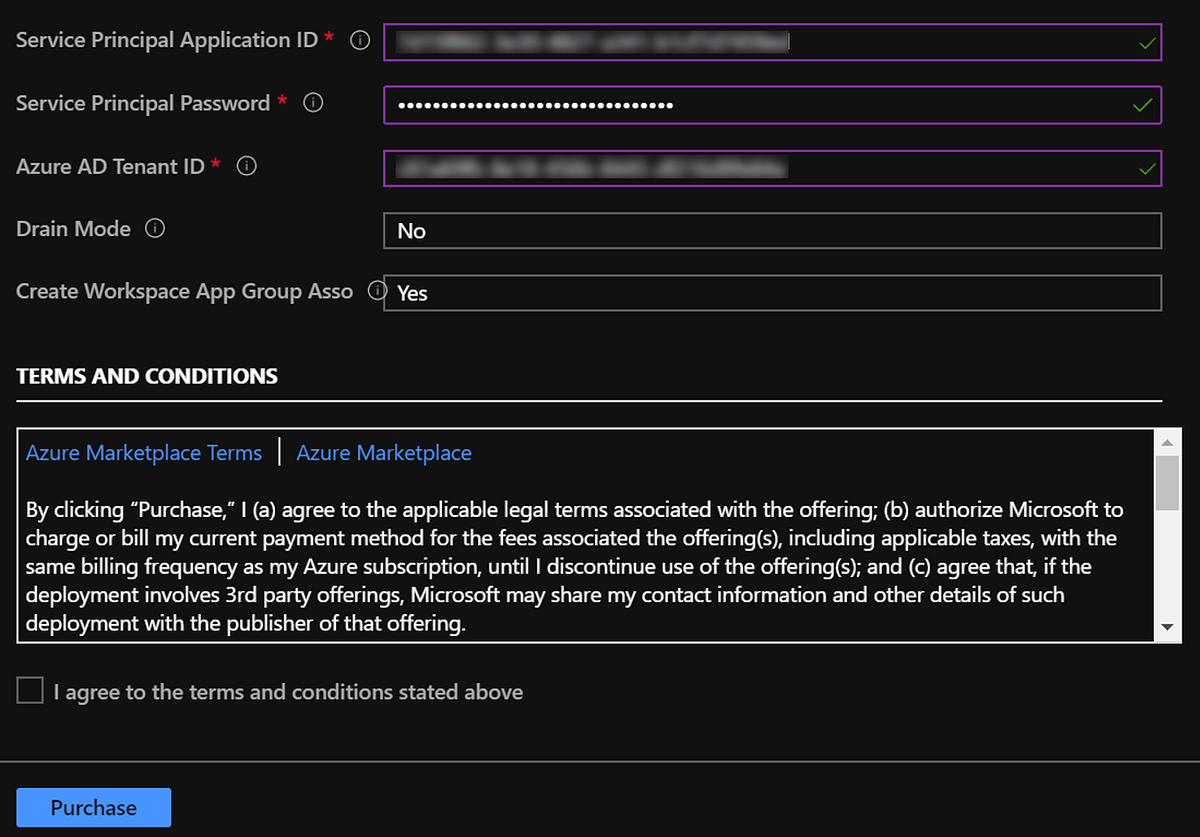
In order to collect a couple of parameter to pass to the PowerShell extension, we collect them as part of the JSON template. And after that we kick off the deployment…
STEP 5 Taking a look at the end result
The entire JSON template only took 11 minutes to complete! This includes the creation of the domain joined VM, all the WVD backplane components ( workspace, Host pool, AppGroup) and adding the VM to the WVD host pool!
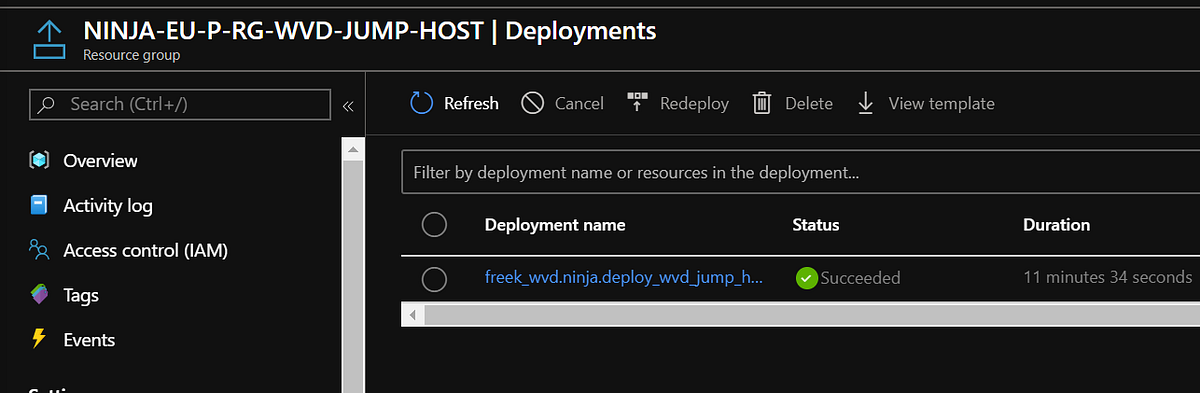
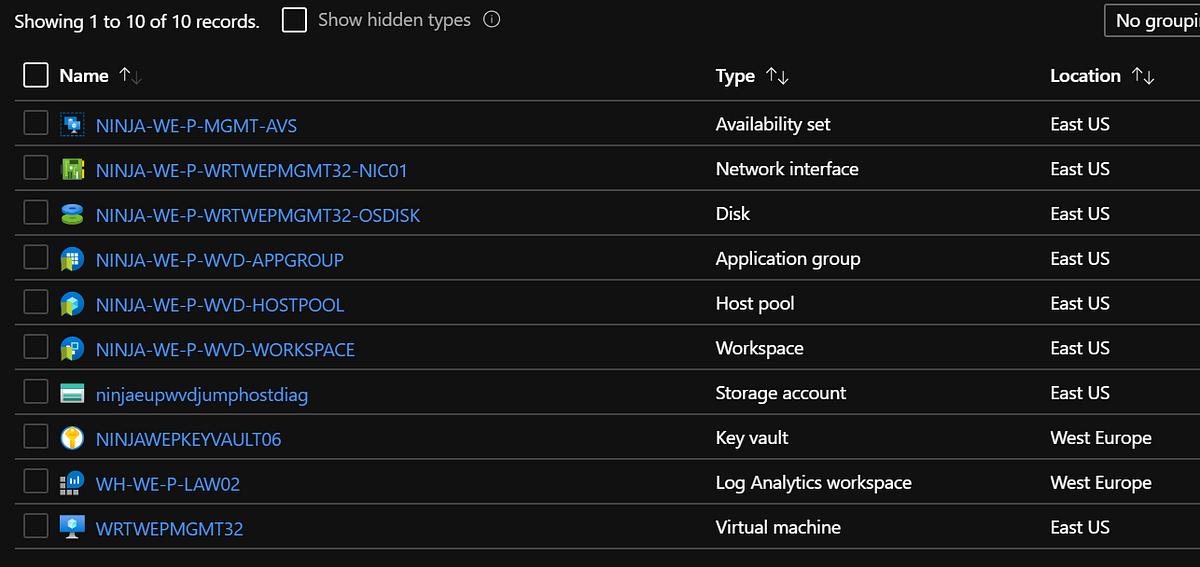
Below is what it looks like from a Deployment overview as well as from a Resource Group overview with the created Azure objects.
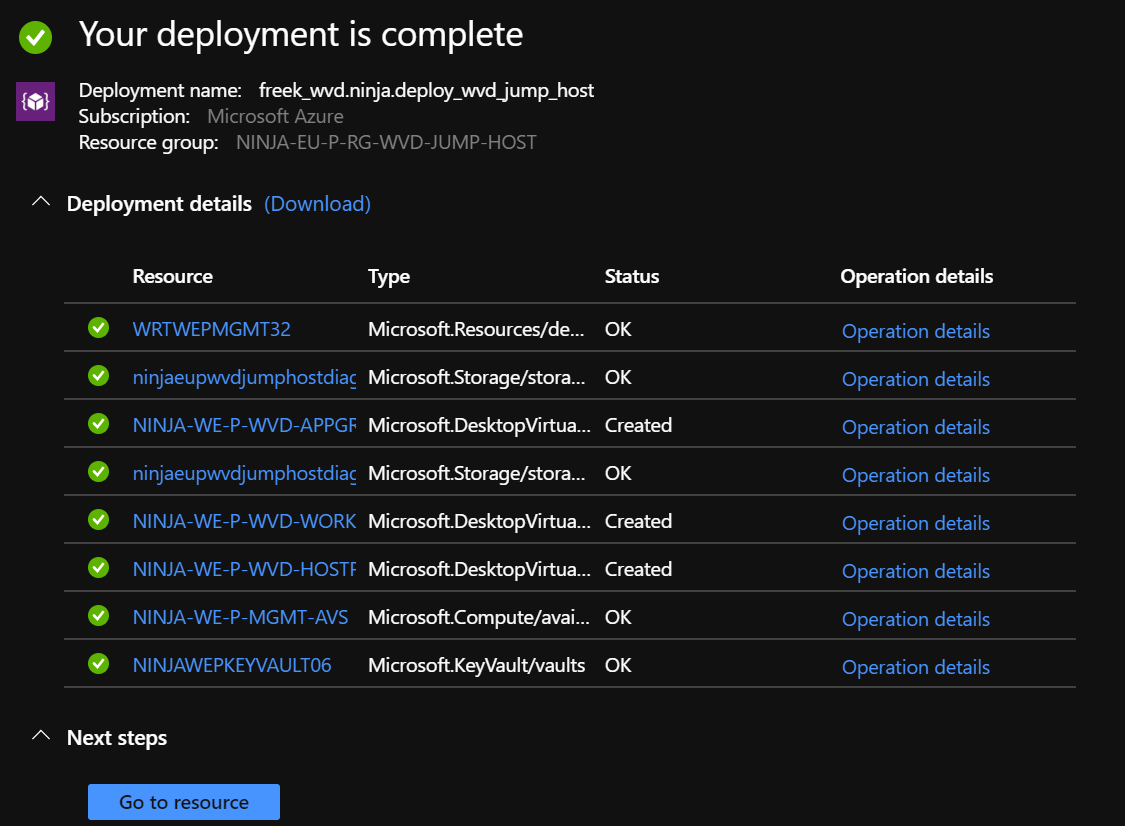
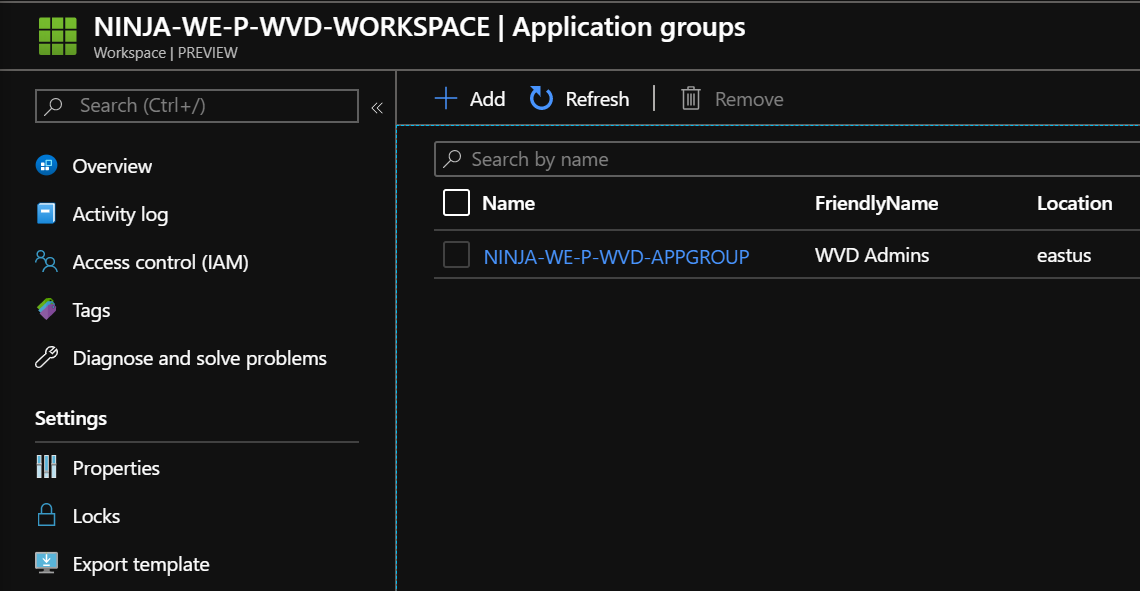
The template created a WVD Workspace and performed the association with the created AppGroup.
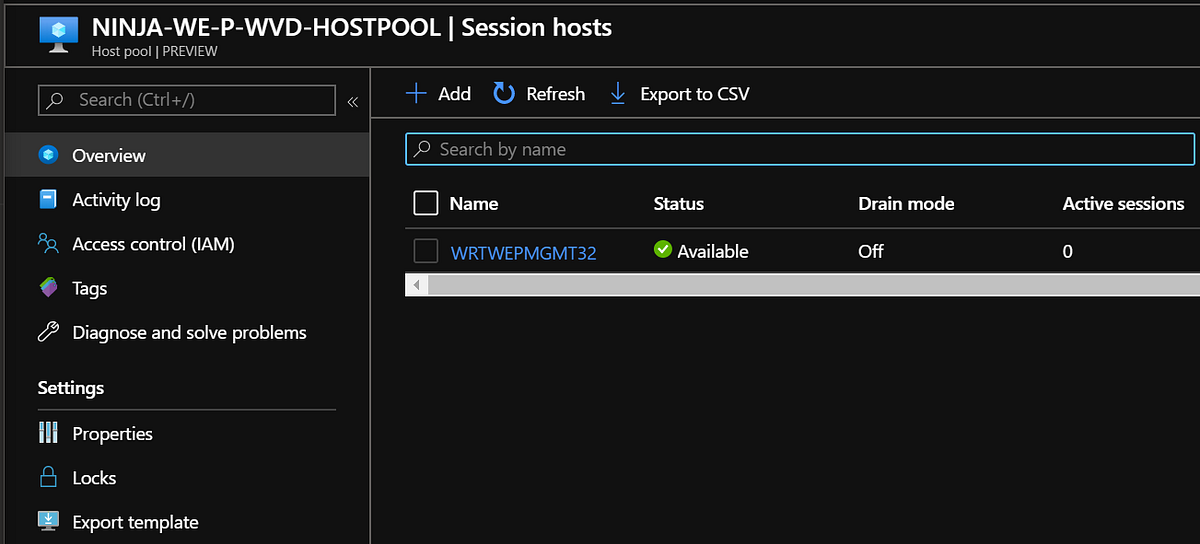
And the Host Pool is created with the Management Server added and available as well.
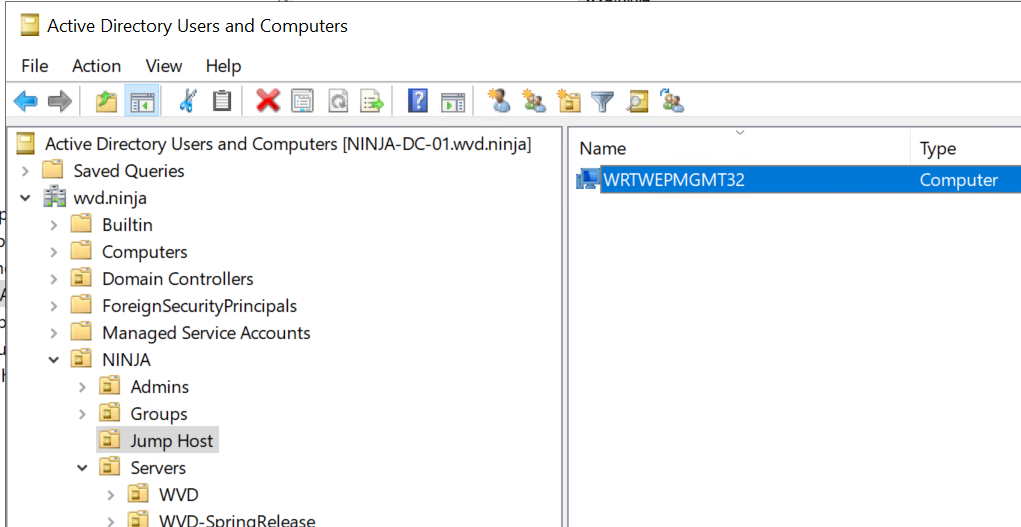
Ans also, the VM was joined to the domain inside the designated OU we specified as one of the parameters.
So, we have deployed a secure and easy to access management server published via WVD and accessibly anywhere using any device in ~11 minutes! Lets see the end result!
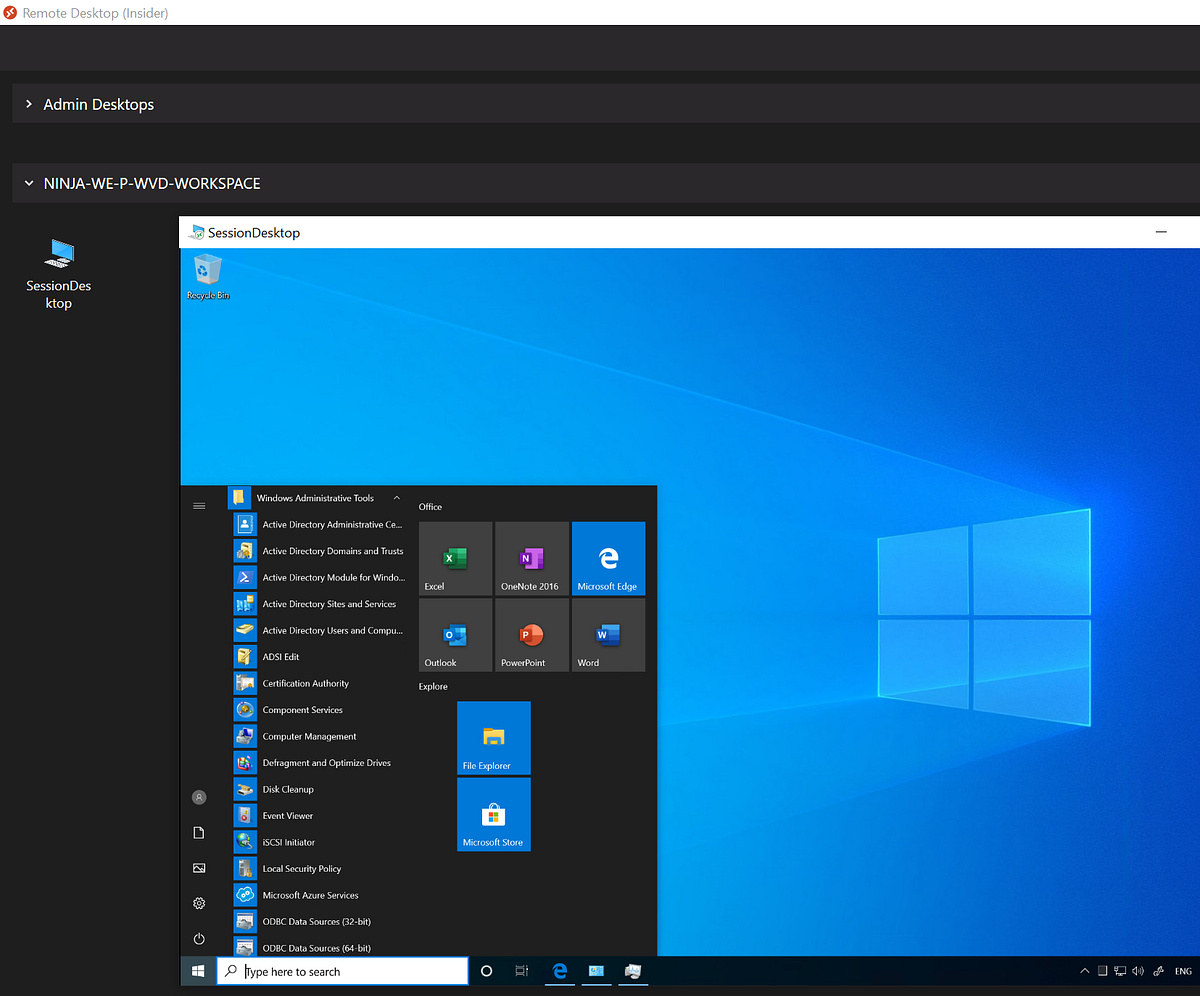
When we log on to Windows Virtual Desktop, in this case using the Windows Client, we have the Management Server available with all the admin tools we need!
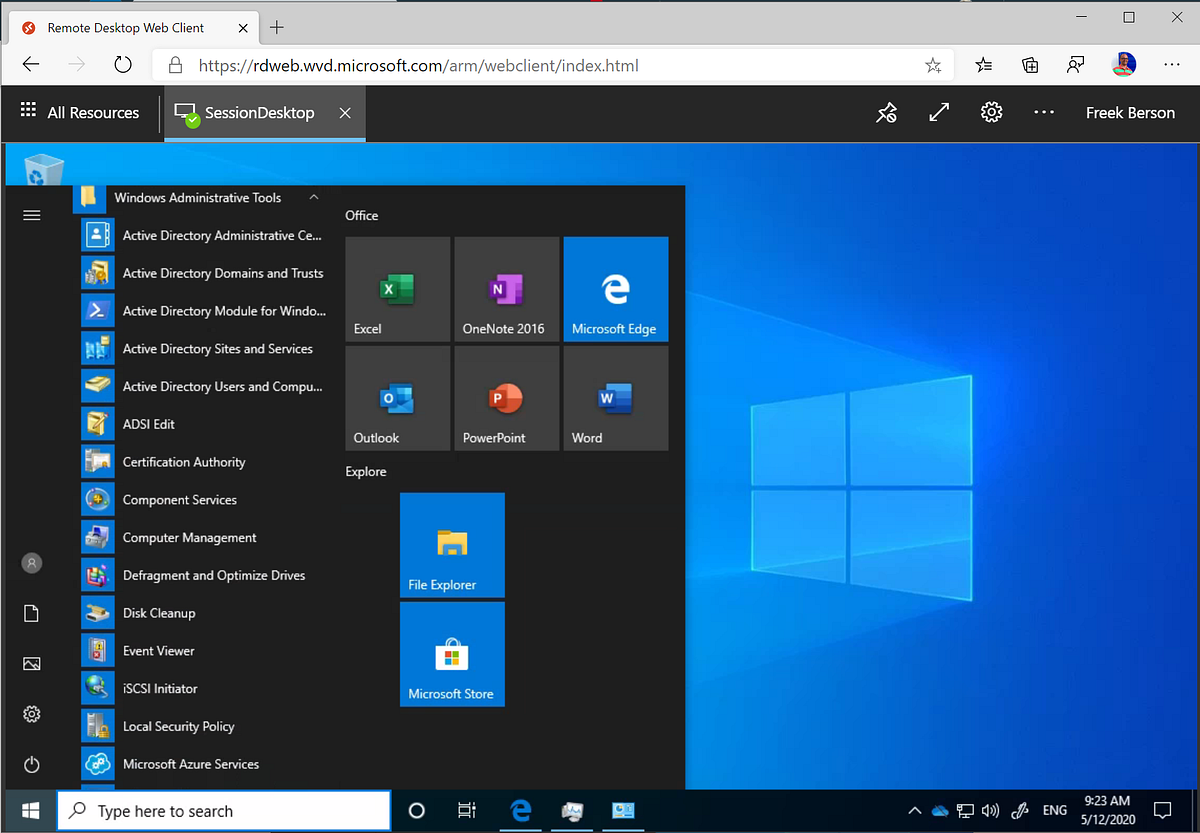
And of course we have that same management server available at our finger tips on any other OS as well using the Remote Desktop App from the various AppStores, including a Web Client based on HTML5.
To conclude: In this article we talked about using a centralized Management Server / Jump in Azure and publishing it to administrators, applications vendors and external contractors using Windows Virtual Desktop! This allows secure access for management purposes using any device from any location! Regardless if you are already using WVD for other purposes or not, I can recommend using the service to provide easy and secure access, including conditional access, to a management server without the needing a VPN.
No comments:
Post a Comment